Sample Report- NACHI Narratives 2014
(click the blue link to view the entire report)
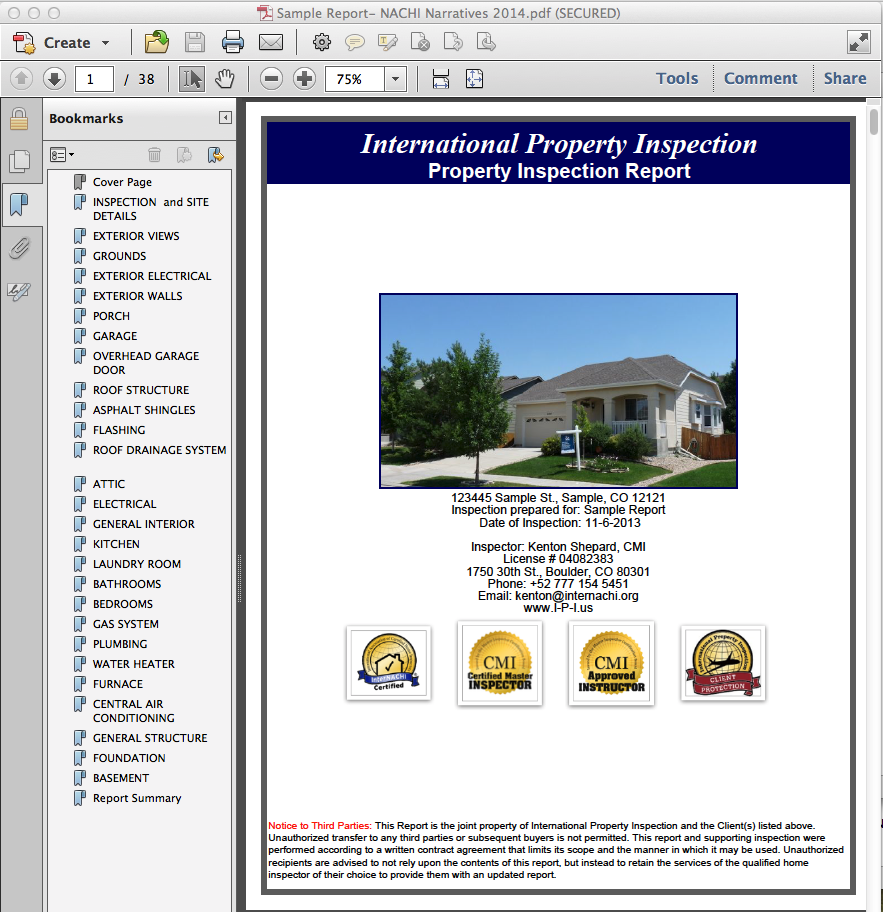
Above is one of my old sample narrative reports supplied as an example of formatting only. Narratives and Documents have been updated and the update was released in October, 2014 . You can use this report as a guide in formatting your own reports. You may not necessarily want your reports to look like this sample, but the following screens will show you how to control the different features that determine how your report will look.
COVER FEATURES
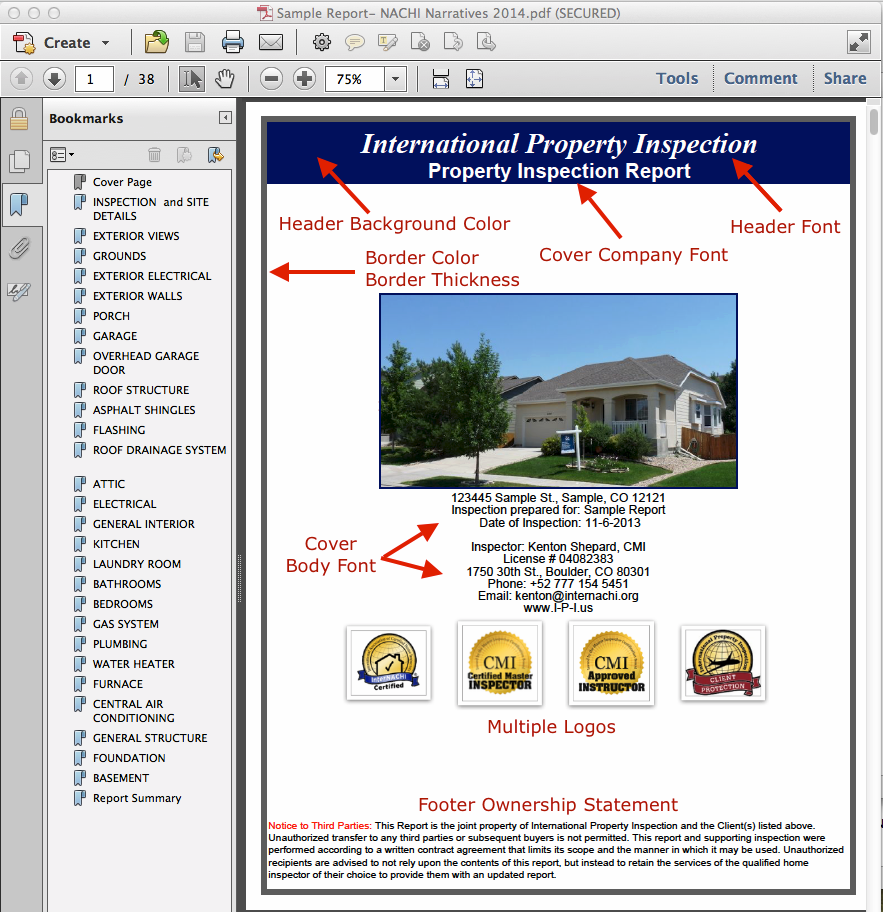
-- Click the images to enlarge --
To control the cover features, once you've opened Home Inspector Pro and opened your template, you'll:
- choose "Report Settings" from the top toolbar (the one that starts with "File"), then
- choose "Formatting" from the drop-down menu.
You'll see buttons that correspond to the parts of the report cover identified by arrows in the image above. You may have to use the black arrows in the HIP screen to scroll right and left through the choices.
Editing the Cover Company Title ("Property Inspection Report" on my sample report cover):
- Choose "Report Settings" from the top toolbar (the one that starts with "File);
- Choose "Options" from the bottom of the drop-down menu;
- Choose "Layout".
At the bottom of the Layout screen you'll see an option to edit both the Cover Page Title, and the Summary Page Title.
Installing Multiple Logos
This is not an HIP feature, but here's how you can do it:
- Open a blank MS Word document;
- Drag and drop your logos into the document;
- Re-size and place the logos where you want them (typically side by side);
- Take a screenshot of the logos. To take a screenshot:
- Mac: Hold down Command and Shift and press 4. Drag the cross-shaped cursor around the logos. When you release the mouse button the screen capture will appear on your desktop under the title "Screenshot" with the date and time.
- PC: click the Windows icon in the lower left corner and Choose "Snipping Tool" from the pop-up menu. Drag the cross-shaped cursor around the logos. When you release the mouse button the screenshot will appear and you'll need to choose "File" and "Save", and then save it in an appropriate place. Often on your desktop, but for sure... someplace where you can find it 30 seconds from now!
- Choose "Report Settings" from the top toolbar (the one that starts with "File");
- Choose "Company Logo" from near the top of the drop-down menu;
- Remove any logo you see in the Add Logo screen;
- Choose "Add Logo" and browse to the location at which you stored your multiple logo screenshot (about 30 seconds ago).
- Use the choice at the bottom of the Add Logo screen to specify where on the cover you want your logo to appear.
![]()
-- Click the image to enlarge --
This image shows the screens where you can add your footer and logo (click to enlarge).
Footer Ownership Statement
Sooner or later- especially with a home in which the transaction failed and your report was tucked away in a file folder- an agent is going to use one of your old reports to try to sell the home to another buyer. With the increasing passage of time, the report will become more outdated and dangerous conditions not mentioned in the report can develop. If in the future something bad should happen as a result of such a development, you may find yourself named in a lawsuit. For this reason it's best to put a statement of ownership where it can't be missed... right on the cover as a footer. To install the footer text:
- Choose "Report Settings" from the top toolbar (the one that starts with "File");
- Choose "Cover Page Footer" from the top of the drop-down menu; and
- Install the statement of your choice. Feel free to use mine.
REPORT BODY FEATURES
The features covered below are a little difficult for some people to use because they have trouble matching the report features they wish to edit with the button titles. Other button titles, such as "Photo Captions" are obvious and are not covered here.
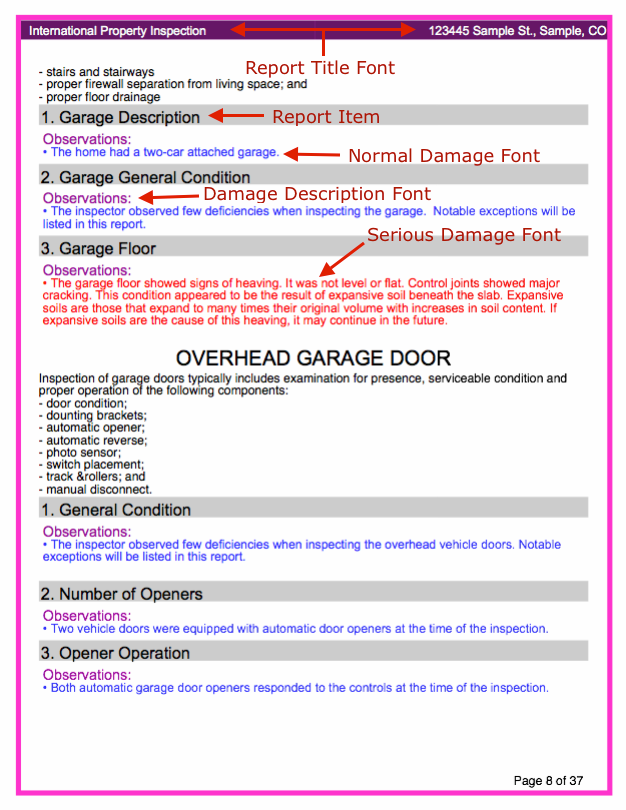
-- Click the image to enlarge --
A sample page identifying different report features.
Report Item
To change the font type, color, style, and background of the Report Item:
- choose "Report Settings" from the top toolbar;
- choose "Item Name Format" from the drop-down menu.
In the Report Item Description screen, in addition to changing the font, you can change the background color or make it transparent.
Damage Description Font, Normal Damage Font, and Report Title Font
The sample report choices:
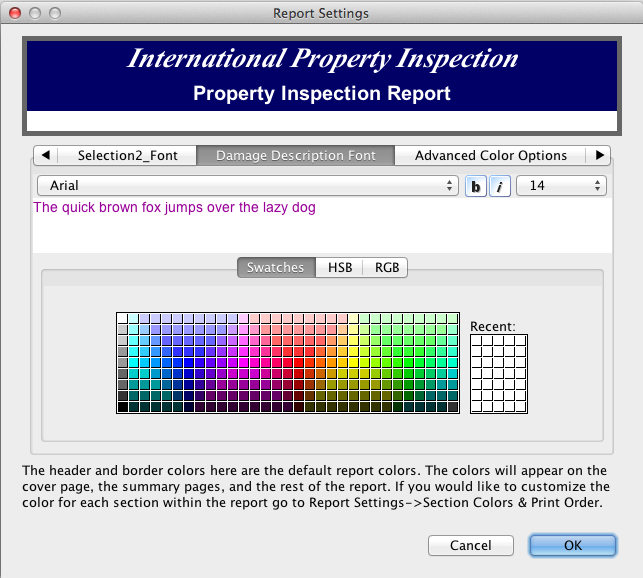
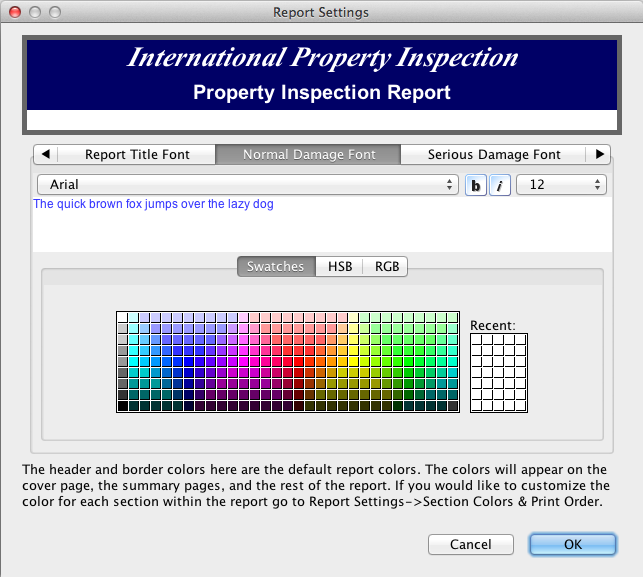
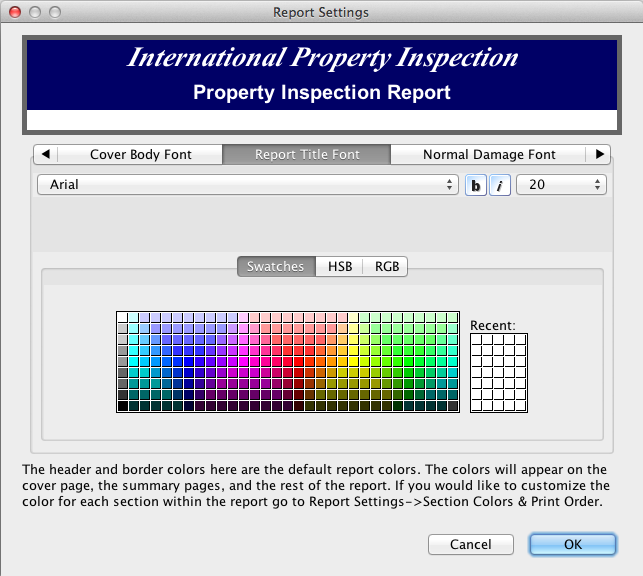
To change the font type, color and style of these features:
-
- choose "Report Settings" from the top toolbar;
- choose "Formatting" from the drop-down menu.
- choose the buttons with the corresponding names.
Page Borders
The sample report choice:
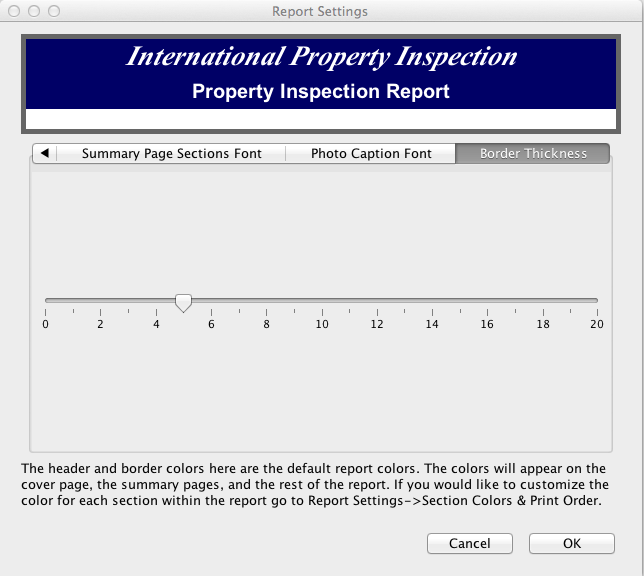
The separate buttons for controlling page border color and thickness are both located under "Report Settings and Formatting".
Photo Sizing and Borders
To specify:
- photo size;
- photo quality;
- border color and thickness for cover and report body photos;
- line thickness for annotation like arrows, rectangles, etc.; and
- use of a highlight box behind text placed on the photo (recommended):
- Choose "Report Settings" from the top toolbar;
- Choose "Options" from the bottom of the drop-down menu;
- On the Layout Options screen choose "Picture Editing".
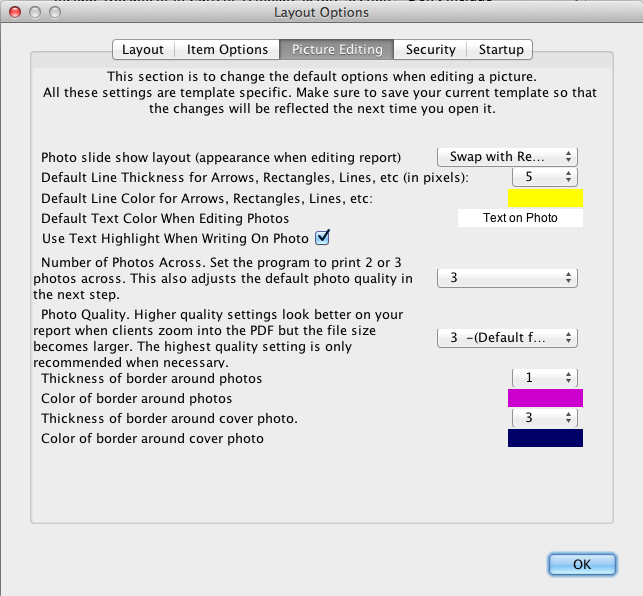
This is what the picture Editing screen looks like.
NOTE: HIP is not set up to use Helvetica, even though it appears as one of the choices on the software font menu. To keep matters simple, I have used Arial. If you change fonts and have trouble, it may be that there are fonts in addition to Helvetica that are not supported.
SECTION COLORS AND PRINT ORDER
The Sample Report Choices:
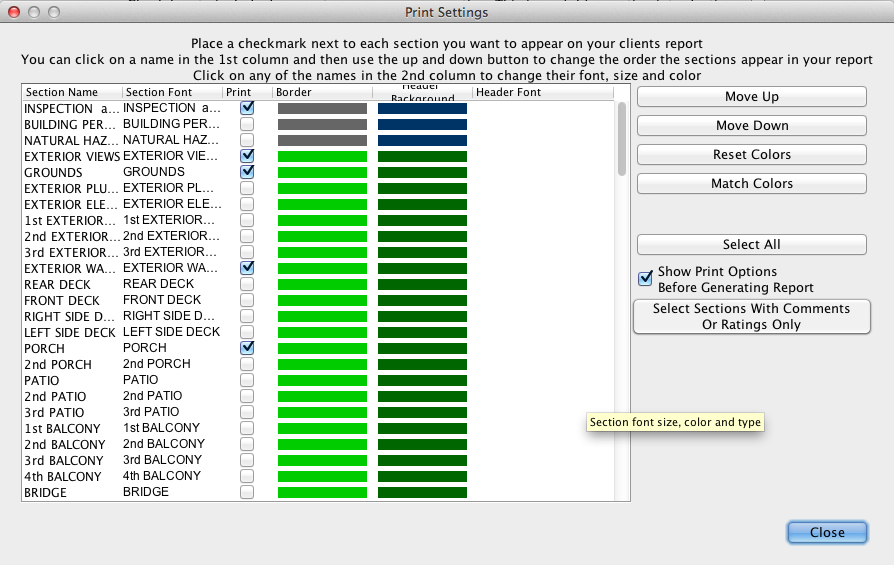
For comparison, you can see how the colors in the sample report are set.
Purchase/demo the HIP software here
Purchase the Narrative Library template for HIP here, only $225