Inspecting wood decay in a log home requires a systematic approach that combines visual examination, tactile probing, and targeted moisture measurement, focusing on areas most prone to moisture and deterioration. The goal is to identify incipient decay early, before it compromises structural integrity.
Preparation and timing
- Perform the inspection when the logs are relatively dry, ideally after the home has been closed up for several days and before or after a maintenance staining cycle.
Visual observation
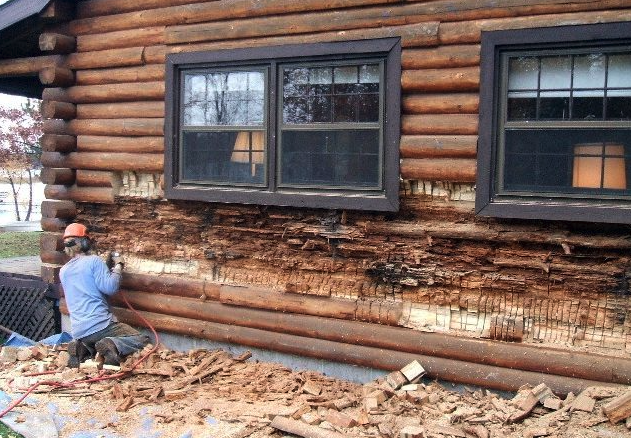
- Walk around the exterior and upper‑story balconies, watching for differences in color: darker or stained logs, especially at the base, corners, or under eaves, often indicate prolonged moisture exposure and possible decay.
- Note any discoloration, soft‑looking spots, bulging, or pronounced cracking that follows a pattern of wetting (e.g., under downspouts, splash zones, or shaded north‑facing walls).
- Check for visible fungal growth (mushrooms, brackets, or conks) on or near logs, as well as mold or mildew films, which signal chronic moisture and increased decay risk.
Disclaim core decay
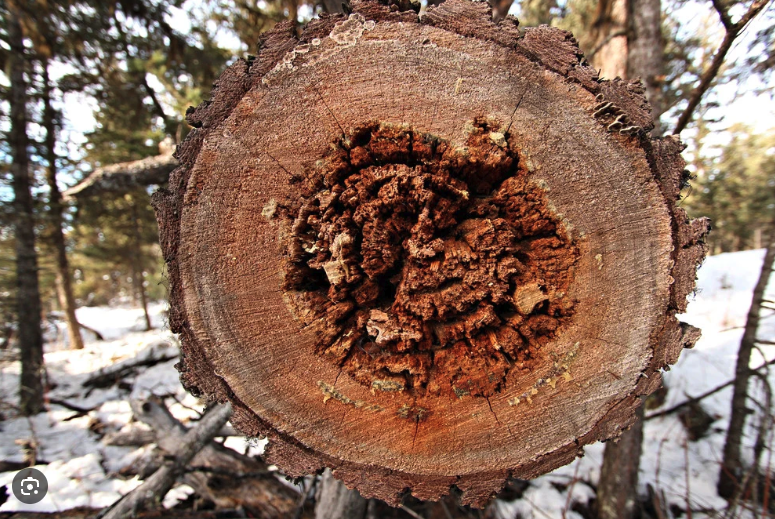
- Log cores may be decayed but show no visual evidence even though their strength will have been copromised.
Hands‑on probing and tapping
- Use a small, pointed tool (ice pick, awl, or thin screwdriver) to gently press into suspected areas such as log ends, corners, around windows, and at the intersection of logs and siding or stone.
- Soft, spongy, or “mushy” wood that compresses easily or yields with only light pressure indicates decay; contrast that with adjacent sound log that resists penetration.
- Tap logs lightly with a hammer or handle; solid logs give a firm, resonant sound, while areas with hollow or dull thuds often conceal internal decay. Always test adjacent sound‑looking logs for comparison.
Moisture assessment
- Use a pin‑type or pinless moisture meter to check log moisture content, paying close attention to lower logs, corners, and log ends.
- Sustained readings above about 18–20% in the wood suggest moisture accumulation and a higher likelihood of decay, especially if the same area is visually suspect.
Structural and geometric cues
- Look for irregularities such as sagging corners, shifting joints, or misaligned windows and doors that may stem from decayed posts, corner logs, or structural timbers.
- Examine log ends at eaves, roof beams, and purlins that extend beyond the roof line; these areas are particularly vulnerable to water infiltration and decay.
Interior and transition‑zone checks
- Check interior log walls, especially near windows, doors, and elevated floors, for discoloration, musty odors, softness, or past repairs that may mask underlying decay.
- Inspect transitions between logs and masonry, concrete, or stone, where moisture can be wicked into the wood and held in contact for long periods.
When decay is found
- For small, localized decay, removal of soft material, borate or epoxy treatment, and epoxy‑fill repair may stabilize the log.
- For larger or structurally significant areas, emphasize the need for professional log home restoration or replacement of the affected log or log section, rather than cosmetic patching.
By methodically inspecting these zones and combining sight, touch, and moisture‑meter readings, you can reliably detect early wood decay in a log home and differentiate between surface weathering and true fungal deterioration affecting structural performance.